How to Make Nickel Gap Shiplap Using Woodline Rabbeting Router Bits
Nickel gap shiplap offers a clean, timeless look with a consistent reveal between boards — and with the right tools, you can make it yourself. Using Woodline’s rabbeting router bits, you can create precise, repeatable profiles without the need for tongue-and-groove joinery.
Materials & Tools
• Kiln-dried lumber (pine, poplar, or MDF)
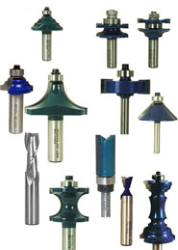
• Router with a Woodline rabbeting bit
• Router table (optional but recommended for control)
• Measuring tape and square
• Sandpaper or orbital sander
• Paint, stain, or clear finish
• Spacers (nickel, tile spacers, or custom jigs)
Step 1: Mill and Cut Your Boards
Start with straight, flat boards. Plane and rip them to your desired width — 5¼ inches is a popular choice. Aim for a consistent thickness of ¾ inch for a traditional shiplap feel.
Step 2: Cut the Rabbet with Woodline Bits
Install a Woodline rabbeting bit (WL-1342-1 or WL-1225-7) in your router. These bits come with interchangeable bearings, allowing you to control the depth of cut — typically ⅜ inch deep by ½ inch tall for a classic shiplap profile.
Run each board along the bit to cut a rabbet on one long edge. This creates the overlapping lip that defines shiplap and allows for a clean nickel gap when installed.
Tip: Use a router table for better control and consistency, especially if you're working with longer boards.
Step 3: Check Fit
• Rout two scrap pieces and check the fit:
o Boards should overlap easily.
o A clean, even gap (about 1/16" or the width of a nickel) should appear.
• Adjust the bit height and/or depth if needed for tighter or looser fit.
Step 4: Create the Back Relief Groove (Optional)•
Some shiplap includes a shallow groove on the back to reduce cupping. Use a dado or groove cutter for this or skip if you prefer a flat back.
Step 5: Sand and Pre-Finish
Sand all surfaces smooth. Apply primer and paint or stain before installation to ensure even coverage and avoid visible raw edges in the gaps.
Step 6: Install with a Nickel Gap
• Let boards acclimate to your space for 48–72 hours.
• Mark your studs and start from the bottom.
• Use construction adhesive and finish nails to secure each board.
• Insert a nickel or spacer between boards to maintain a consistent gap.
• Work your way up, staggering seams and trimming the final row to fit.
Woodline’s router bits are built to last and deliver clean, chatter-free cuts — perfect for a project like this.